Surface SDK SP1 on Vista and Win7 x64

Introduction

This is a follow up post to Surface SDK on Vista x64 where we got the original Surface SDK working on the unsupported Vista X64. Last week Microsoft released Service Pack 1 of the SDK and there is an additional tweak that we need to get it going.

The original post was split into 3 sections:

  1. Patch the MSI and install
  2. Patch the Simulator and other files
  3. Configure our projects

Steps 2 and 3 haven’t changed with SP1 (we don’t need to “corflags” the new “stress” tool as it connects to the simulator rather than launching it), so jump over to the original post when you’ve got the SDK installed.

Prerequisites

  • Surface SDK SP1 (duh!)
  • Visual Studio 2008 (for corflags)
  • Orca (part of the Windows SDK or just search for it)
  • Administrator access to the Vista or Win7 box you’re installing onto.

Step 1 – The MSI

Firstly we need to use Orca to tweak the launch conditions of the MSI. Make sure you’ve installed all of the SDK pre-requisites first, then walk through the following:

  1. Install Orca (link above, or just search for it).
  2. Copy the SurfaceSDKWE.msi to somewhere on your hard disk, and make sure that it’s not Read Only.
  3. Right click on the MSI and choose Edit with Orca. This will trigger a UAC, but it’s software from Microsoft, so you should be ok to trust it 🙂
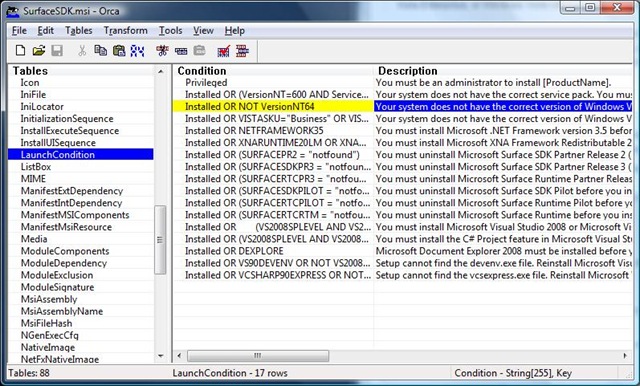
  4. Select “LaunchCondition” in the left hand list, then select “Install OR NOT VersionNT64” in the right hand list (see below).
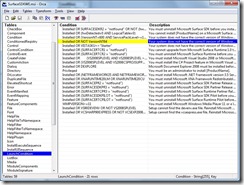
    Remove Launch Condition
  5. Press delete and click OK when asked to confirm the row delete.
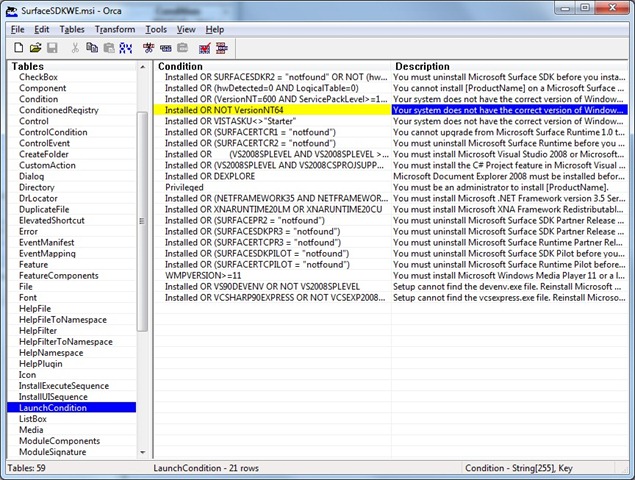
This is where we got to with the original SDK, but the SP1 install will still fail if we leave it like that. As part of SP1 Microsoft has added automatic updates and automatic error reporting. Unfortunately the exe they call as a custom action doesn’t work on x64 (it looks like it puts registry entries in the wrong place), which causes the install to fail. We could extract the MSI, patch the custom exe with corflags and then run setup, but we won’t do that because:

a) We don’t want automatic updates as they will overwrite our nicely patched exes, and
b) x64 is not a supported platform, so I’m sure Microsoft aren’t particularly interested in error reports!

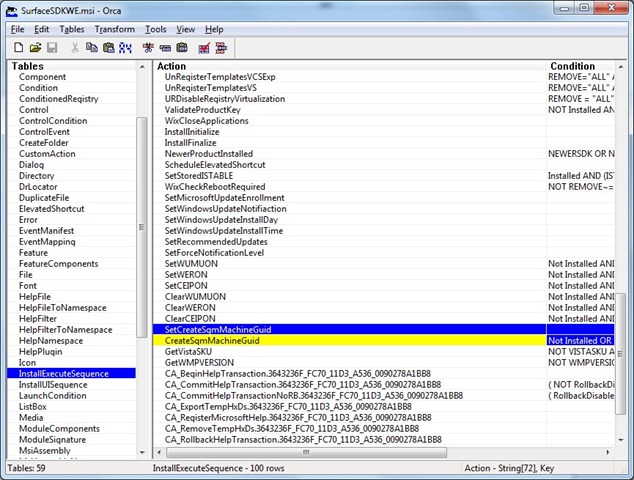
Instead of that we can just continue with Orca to remove those commands from the installer:

  1. From Orca, select “InstallExecuteSequence” in the list on the left and remove SetCreateSqmMachineGuid and CreateSqmMachineGuid as before:Remove Sqm
  2. Click Save on the toolbar

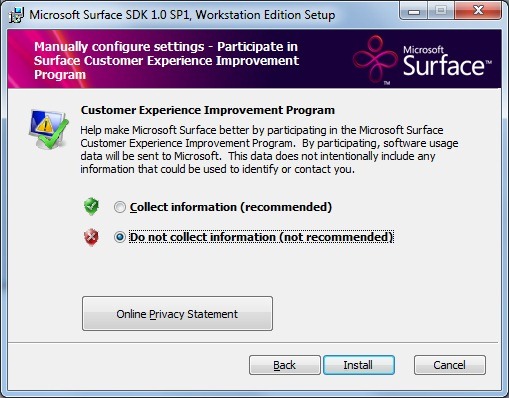
Now you can quit Orca and run the msi, which should install just fine. Make sure you also switch off automatic updates and error reporting as follows:
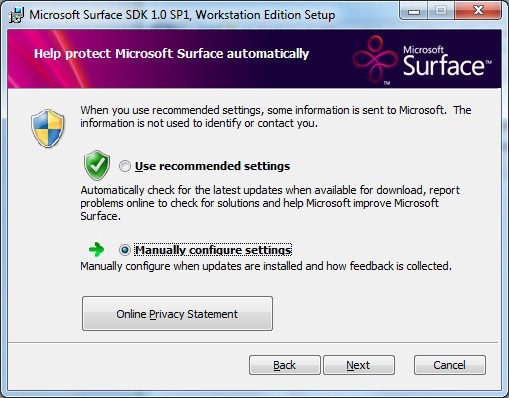
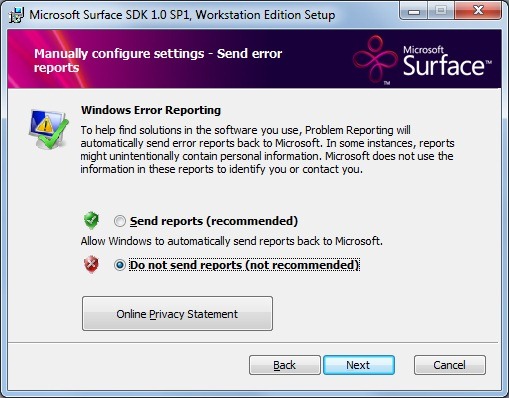
Surface SDK SP1 Wizard 1 Surface SDK SP1 Wizard 2Surface SDK SP1 Wizard 3

Now the SDK is installed, head over to the original post and follow steps 2 and 3 and you’re all done.

Thanks to JamesK for his workaround comment on the original post.

Update: thanks to Michael Zervos for letting me know that the academic version of the SDK comes in EXE, rather than MSI form. As he points out on his blog, if you keep an eye on your %temp% directory when you run the EXE it will extract the MSI for you to copy and patch.

Update again: Thanks to Robin Sanner for providing details on getting the samples to work:

To get the samples to build and install correctly do the following:

– Edit the configuration properties for the sample solution and create an x86 platform for all projects.
– Edit InstallSamples.bat
– Comment out the lines on either side of the set as follows:

::FOR /F “eol=H tokens=2*” %%A IN (‘REG QUERY HKEY_LOCAL_MACHINE\SOFTWARE\Microsoft\Surface\v1.0 /v IsLogicalSurfaceUnit’) DO SET LogicalTableValue=%%B
SET InstallingOnTable=false
::IF %LogicalTableValue%==0×1 SET InstallingOnTable=true

– Change the MSBuildParameters to reference the x86 PlatformName as follows:

SET MSBuildParameters=/p:Configuration=Release;PlatformName=x86 /noconsolelogger /fl /fileLoggerParameters:LogFile=%LogFile%;Append /nologo
Finguistics – Behind the Scenes Video!

Introduction

While we were putting together Finguistics down at Microsoft in Reading, Nick Page was filming mini-interviews about the project, the process and Surface development in general; the result of which has just been released on YouTube.

The Video

The video has a definite “design” slant, so isn’t very technical, which is understandable given the nature of Surface development (designing the apps and the user interaction is FAR harder than actually coding them). Myself, Marc and the other techies do try to throw some technical jibber jabber in there to counter act all the design speak though, so it’s not all crayons and paintbrushes!

I’d like to also point out that I wasn’t told we were going to be filmed, so I didn’t get chance to do my hair OR my makeup, and I had been eating on expenses for 3 weeks at this point, and the camera adds a least half a stone.. and.. and.. 😉

Surface at BETT – Finguistics

The Project

As I’ve mentioned a few times previously, in December last year I was lucky enough to be involved in a project at Microsoft in Reading involving Microsoft Surface. The remit for the project was to create an education specific application as a proof of concept for the BETT Show in London.  BETT is the world’s largest educational technology event, with tens of thousands of visitors, and it was hoped that our application would show how the Surface could be used in an educational context. The development team consisted of guys from Lightbox Education, RM, Microsoft and Infusion and the whole project was put together in a very agile manner in just 3 weeks.

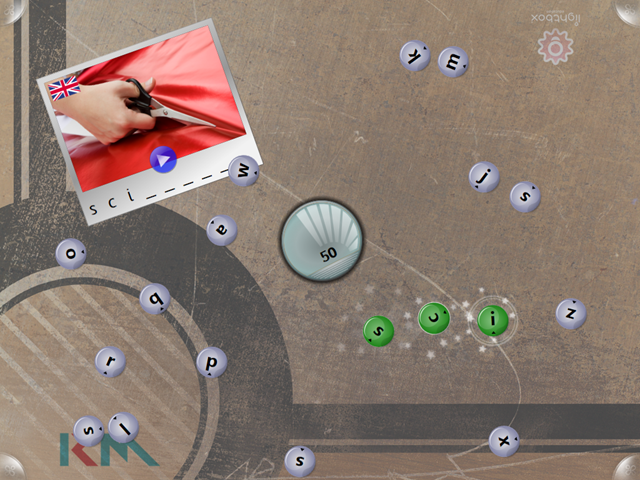
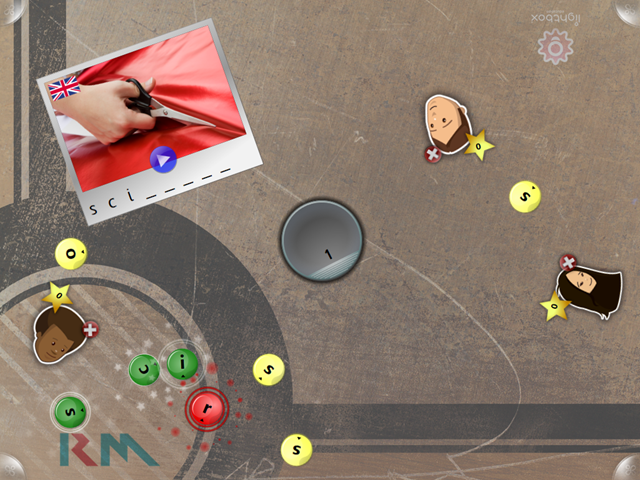
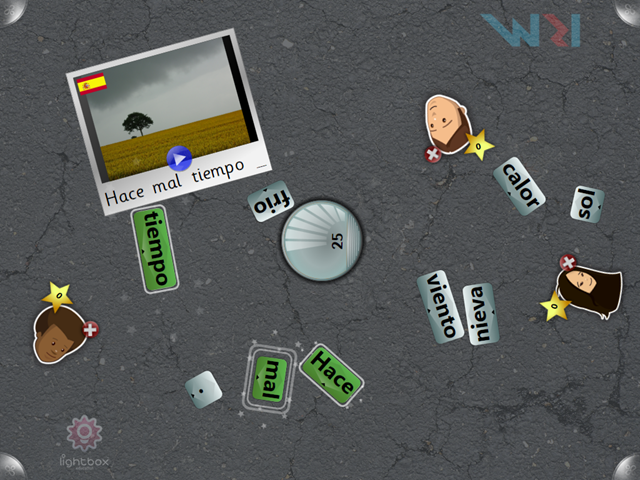
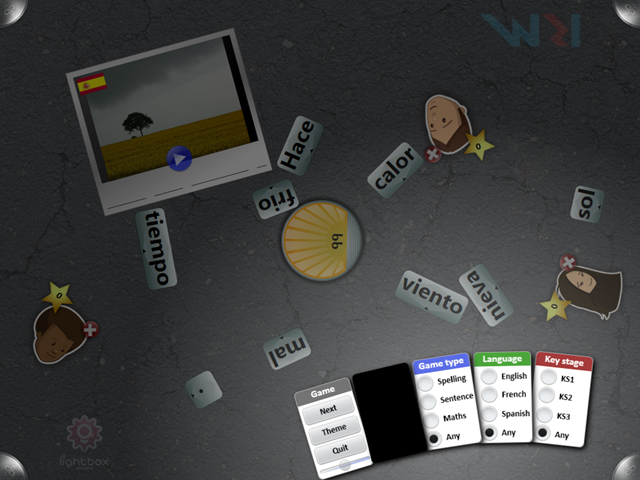
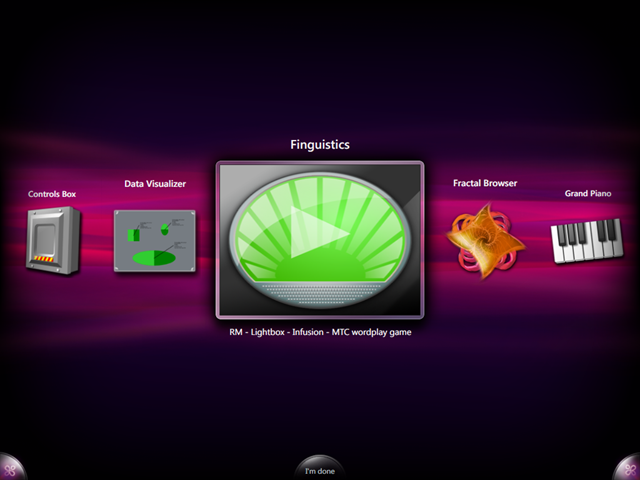
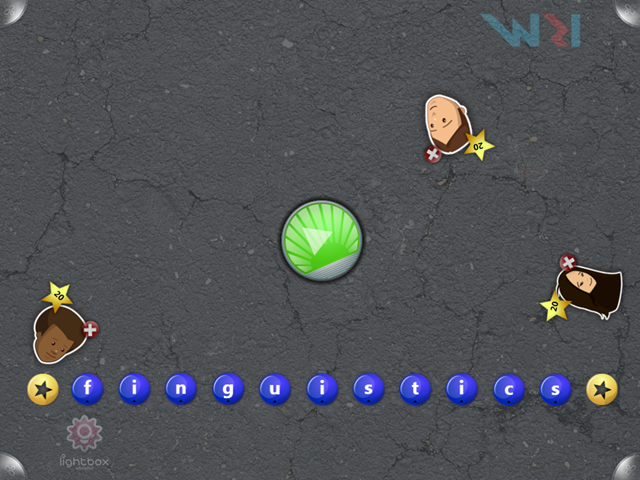
The application itself attempted to promote the collaborative nature of the Surface with a spelling/word/maths game where the users had to work together to pull together the correct spelling/sentence/answer. We had a physics engine to allow the various “tiles” to interact with each other, and using Surface’s object recognition we enabled users to throw down their “id cards” to see their Avatar appear and their scores to be saved. We also created a “Teacher Console” WPF client app that would enable a teacher to view a “live” image of the current game, see scores, view and manage the upcoming game queue and add new content. Unfortunately I don’t currently have any decent videos of it, but here’s some screen shots:

0 menu 1 welcome avatars 2 gameplay spelling 3 gameplay spelling wrong 4 teacher interaction 5 spanish sentence 6 win points 7 wordplay

The Technologies

It was decided early on that the project would use lots of the latest “Microsoft stack”, with plenty of use of the new .net 3.5 SP1 features. Some of the technology I’d used before and some I hadn’t touched – I’ve briefly put some opinions down on the whole stack:

  • Surface Hardware.  The first thing so say is that it works! Although I’d seen the various videos from PDC and other places, I was still rather sceptical as to whether it would actually work in practice. To say I was pleasantly surprised would be an understatement, it works and it works well! The only negative I would bring up is that it could do with a bit more graphical horsepower; it doesn’t take too many graphical effects and animations to make it start to chug.
  • Surface SDK.  The developer SDK for the Surface is basically a thin layer of controls that sit on top of WPF.  From a technical standpoint, if you know WPF then the leap to Surface is a very small one. The hardest part to grasp is the change in mindset to take into account the natural and 360 degree nature of the Surface. The SDK itself comes with a Simulator that enables you to perform basic testing of your application and enables you to plug in several mice to simulate multi-touch. It’s a very useful tool, but it’s certainly no substitute for a Surface unit itself, and I don’t believe you can do any serious Surface development without the hardware to hand.
  • Entity Framework.  Consuming an EF model and working with it seemed pretty solid, and I had no real complaints there, but I found the design surface to be confusing and unreliable. We had a few times where the design surface corrupted the XML file, and I felt at times that I was randomly clicking on things in an attempt to get it to display what I wanted it to display.
  • ADO.Net Data Services. Very simple to implement and the functionality you get for virtually no code is very impressive. Unfortunately it’s currently lacking a lot of functionality you may take for granted if you’ve worked with EF or LINQ to SQL before, and you might be forgiven for thinking it’s entire LINQ implementation consists of just NotImplementedExceptions 🙂

All in all in was an excellent experience, and I believe the application was well received at BETT. Hopefully someone will stump up large amounts of cash for us to put together more Surface apps in the future 🙂

Edit: Marc Gravell, of unfeasibly large Stack Overflow reputation fame, has blogged about his experience on the project too.

Edit: There’s a very brief video of Jim Knight (the UK Schools Minister) playing Finguistics on Teacher.Tv

More Links: Finguistics got a mention on the MSDN Surface Blog, and there’s also a nice write up of kids playing the game at BETT, along with a photo of the game in action on Shakeout’s Blog.

Finguistics in a School! A Surface unit with Finguistics installed (amongst other apps), has recently been showcased at Churchend Primary School in Reading. More details on the Reading Borough Council website.

Another Writeup! There’s a nice write up of the Surface in education, and Finguistics, on Merlin John Online.

Surface SDK on Vista x64

Update: There is a new post on this subject regarding the Surface SDK SP1, and it’s also verified working on Win7 x64 too 🙂

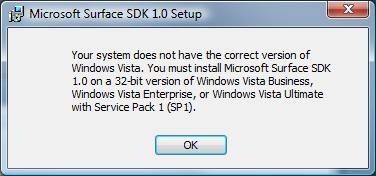
If you are lucky enough to have access to a Surface and/or it’s corresponding SDK, you may have tried to install that SDK on a 64bit Vista installation. If you did you will have been greeted by the following delightful error message:

"Your system does not have the correct version of Windows Vista. You must install Microsoft Surface SDK 1.0 on a 32-bit version of Windows Vista Business, Windows Vista Enterprise, or Windows Vista Ultimate with Service Pack 1 (SP1)."

Rather than grab a different machine with a 32bit install, I thought I’d see whether it was possible to get it up and running on x64. Although it turned out to be quite simple to get working, with no registry hackery required, there may be good reasons why this configuration isn’t supported, so use these instructions at your own risk!

To get things up and running you will need the following:

  • Orca – An MSI editor that is part of the Windows SDK. You can grab from the Microsoft download page, or wherever your search engine of choice takes you.
  • Visual Studio 2008 – You might be able to use C# Express, but I haven’t tried it.

There is nothing particularly nasty in these instructions, but it does involve using the command line.

Step 1 – The MSI

Firstly we need to use Orca to tweak the launch conditions of the MSI. Make sure you’ve installed all of the SDK pre-requisites first, then walk through the following:

  1. Install Orca (link above, or just search for it).
  2. Copy the SurfaceSDK.msi to somewhere on your hard disk, and make sure that it’s not Read Only.
  3. Right click on the MSI and choose Edit with Orca. This will trigger a UAC, but it’s software from Microsoft, so you should be ok to trust it 🙂
  4. Select "LaunchCondition" in the left hand list, then select "Install OR NOT VersionNT64" in the right hand list (see below).
    Orca
  5. Press delete and click OK when asked to confirm the row delete.
  6. Click Save on the toolbar.

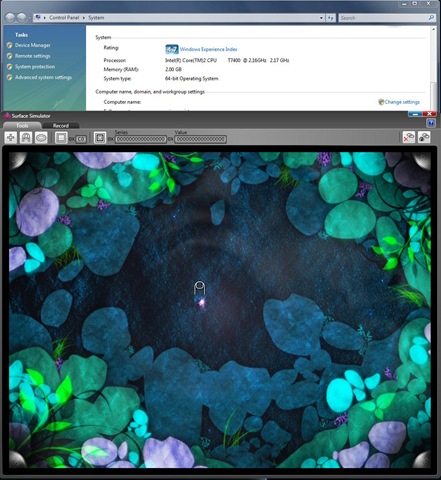
Now if you launch are freshly edited MSI you should be able to install it just fine – hurrah! If you try and launch the simulator though then it will crash almost immediately – boo!

We will fix that though in Step 2…

Step 2 – The Simulator

The reason for the almost immediate crash is due to the assemblies being built for "Any CPU", while relying on a library than only exists for x86. When the simulator starts up it launches in 64bit mode and, because you can’t mix x86 and x64 assemblies, it tries to load the x64 version of XNA (which doesn’t exist) and promptly falls over in a giggling heap.

If this was an app we had written, we could simply change the configuration in Visual Studio to x86 and everything would be rosy (more on this later). Unfortunately I don’t happen to have the source code for the SDK knocking around, so we have to resort to a utility that comes with Visual Studio called CorFlags to force everything to load in 32Bit mode. The following instructions assume you have everything installed in default locations, but they should be easily adaptable if you don’t:

  1. Go and find the "Visual Studio 2008 Command Prompt" from your start menu (All Programs, Visual Studio 2008, Visual Studio Tools) right click on it and choose "Run as administrator" (accepting the resulting UAC prompt).
  2. Change to "C:\Program Files (x86)\Microsoft SDKs\Surface\v1.0\Tools\Simulator".
  3. Enter "corflags SurfaceSimulator.exe /32bit+ /force" (without the quotes). We need to use /force because the assemblies are strong named signed, and altering them this way will invalidate that signature. This is unfortunately unavoidable, but I haven’t found any problems from doing so. You will receive a CF011 warning informing you of this 🙂
  4. Change to "C:\Program Files (x86)\Microsoft Surface\v1.0".
  5. Use the same corflags syntax from step 3 on the following files, one by one: Attract.exe, AttractConfig.exe, SurfaceInput.exe, SurfaceOutOfOrder.exe, SurfaceShell.exe.
  6. Close the command prompt and launch the simulator!
    ItWorks

Now we’re at this point we need to make sure our Surface applications are set to run in 32Bit mode, or they will just crash when we launch them. This is very simple to do in Visual Studio, and changing this is usually the first step in troubleshooting any weird and wonderful x64 development glitches.

Step 3 – Our Applications

Setting our applications to 32Bit is extremely easy. You may think this is crippling our applications a bit, but all of the Surface units are running Vista 32 so it really doesn’t make a difference (other than making them work on x64!)

  1. Launch Visual Studio 2008, and either open a solution or create a new one.
  2. Enter Configuration Manager (if you drop down the "Any CPU" box, there’s an option in there).
  3. Under "Active solution platform", select
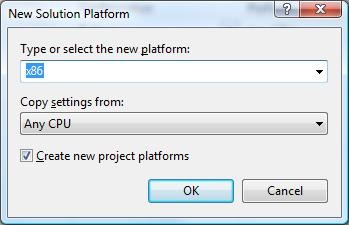
  4. Select x86 as the Type, Copy settings from Any CPU and make sure "Create new project platforms" is selected:
    NewSolutionPlatform
  5. Click OK

The Platform column for each of your projects should now read "x86", and you should be able to launch your Surface applications in the simulator.

Job done! 😀

As I said earlier, there may be good reasons why x64 isn’t a supported platform, so this method falls strictly in the "it works on my machine" camp.